This article walks you through sending your call data to Google Analytics using a Real-Time Event integration. This allows you to easily tie successful call conversions to Google Analytics for better reporting.
Before you begin, you need to have an active Google Analytics account. To set one up, if you do not have one already, please visit www.google.com/analytics. If you already have an account, make sure you are logged in.
There are several steps to setting up this integration:
- Pre-integration step, setting up DNI
- Creating the real-time event
- Viewing your call data in Google Analytics
- Setting up Google Analytics conversion goals
How Does Google Analytics Help Track Your Data?
Google Analytics utilizes a unique tracking identifier, the GCLID, to track every unique website visitor.
When a customer visits your website, the DNI script automatically gathers the website visitor’s GCLID along with other digital attribution data points. The script simultaneously displays a dynamic tracking number on your webpage in place of the static number listed.
By using a DNI number you can gather all the visitor data of those users that called your business, then filters call to only include those that are qualified call conversions and push the call conversions back into your Google Analytics account to analyze call conversions with your other website data analytics.
Google Integration Pre-Step – DNI
Before you begin the integration process for Google Analytics, you need to set up DNI on your website. If you already have this, you can continue to the next step.
If you do not have DNI set up, please follow the directions in this DNI setup guide.
Setting Up Data Integration for Google Analytics
Once DNI is set-up and functioning on your website, you can now create your real-time event. Real-time events provide a constant feed of call information. You can integrate this data into Google Analytics as an Event, helping you tie call data to ad campaigns or traffic to your website you are already tracking in Google.
To begin, create an advanced Real-Time Event within AccuRoute® by following these steps:
- First, navigate to AccuRoute and select Real-Time Events
- Click Create New Real-Time Event
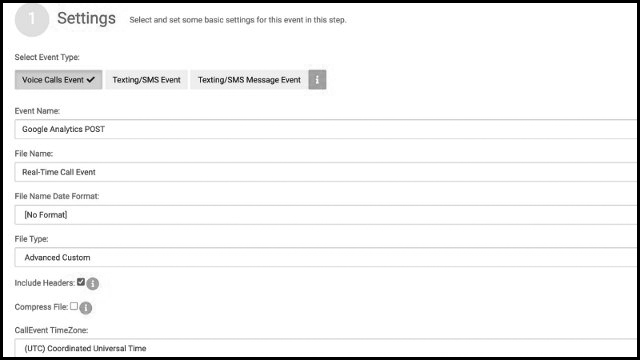
- On the Settings screen, select your event type (Voice Call Event, Texting/SMS Event, or Texting/SMS Message Event)
- Fill in your event information including Event Name, File Name, and File Type; make sure you select Advanced Custom in the File Type drop down menu
- Click Next
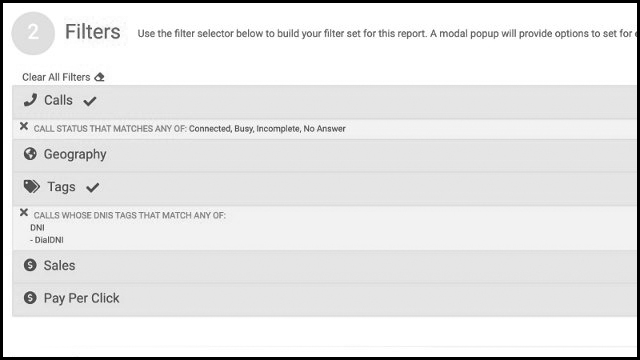
- On the Filters screen, define your filters to determine which calls will generate the Real-Time Events sent to Google Analytics (if no filters are specified, all calls will generate the Real-Time Event – we recommend, at a minimum, only using connected calls)
- Click Next
- On the Options screen, select Advanced and click the +New button to begin creating your template
- The column will appear below as Call Id – You can select the box and begin changing the column name and the data in the column, and drag the boxes to reorder them
- To add more columns, select the orange +Add Column button – we recommend the PPC Click ID, ReferrerType ReferrerHost, Campaign DNIS Tag, and Keywords data points to start
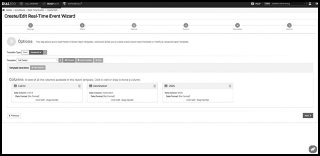
- When you have added the columns you want, click Preview to see the template data fields; your column options are DNIS, Call ID, ANI, Campaign, UniqueCallerID, PPC Click ID, Referrer Type, Campaign DNIS Tag, ReferrerHost, PPC Vendor, and Keywords
- Click Next
- On the Advanced Custom Editor screen, copy and paste the JSON code below, updating the highlighted areas with your Google Analytics ID and the event category (ec) to determine how calls show up in your Google Analytics account
- v=1&tid=UA-xxxxxxxx-1&t=event&ec=Dial800+Call&ea=%{campaign}&cid=%{uniquecallerid}&cm=%{referrertype}&cs=%{referrerhost}&cn=%{campaign_dnis_tag}&ck=%{keywords}&gclid=%{ppc_click_id}

- v=1&tid=UA-xxxxxxxx-1&t=event&ec=Dial800+Call&ea=%{campaign}&cid=%{uniquecallerid}&cm=%{referrertype}&cs=%{referrerhost}&cn=%{campaign_dnis_tag}&ck=%{keywords}&gclid=%{ppc_click_id}
- Click Next
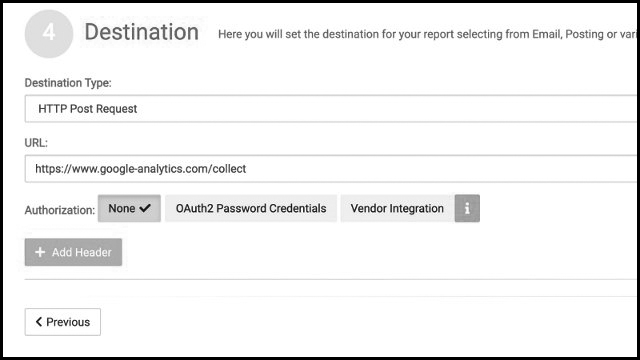
- On the Destination Screen, select HTTP Post Request from the Destination Type drop down menu and put https://www.google-analytics.com/collect as the URL
- Click Next
- Finally, use the Confirm screen to verify all your choices are correct and click Finish
Depending on your inbound call volume, it may take a day or two for call events to appear in your Google Analytics account.
Viewing your Call Data Within Google Analytics
Once your calls start appearing in Google Analytics, this is how you view them:
- Log in to your Google Analytics account and navigate to the Behavior menu
- Click on Events, then Overview
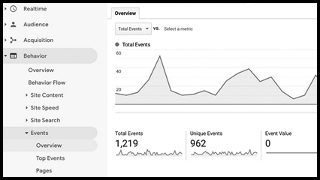
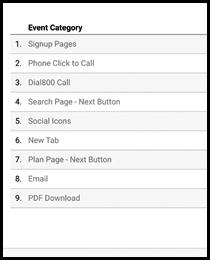
- Look at the Overview to find your Event Category that you set up in your Real-Time Event (See step 13 above)
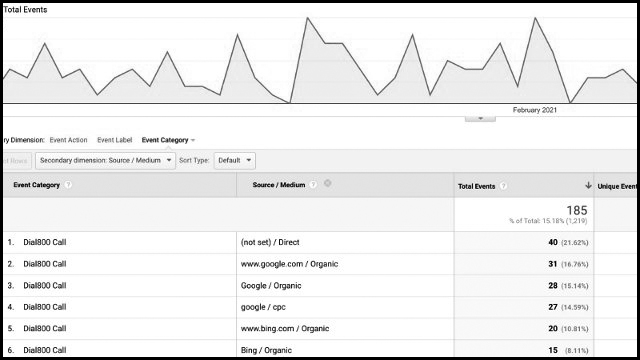
- Click on your event category to view details. Shown below are the source/medium attribution points connected with the calls
Creating the Conversion Goal in Google Analytics
Once your Real-Time Event is created and calls are flowing into Google Analytics, you may want to create a Conversion Goal. This will take your new event data now appearing in Google Analytics and help you compare call conversions against marketing channels.
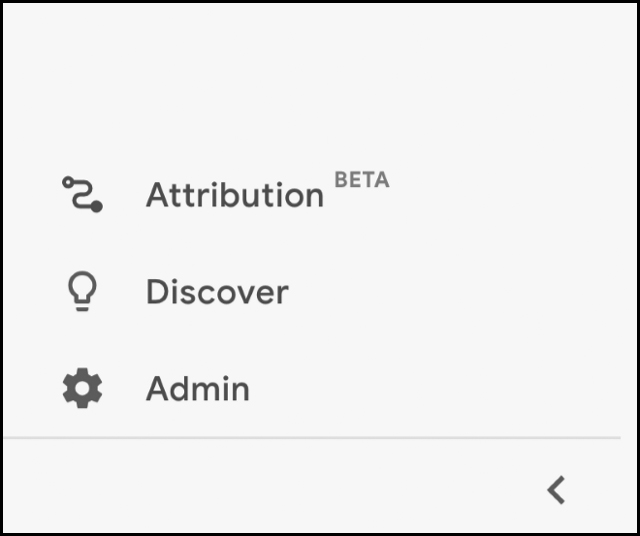
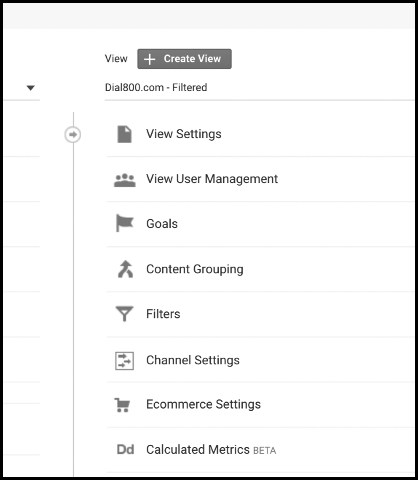
- Click on Admin in your Google Analytics account (in the bottom left corner)
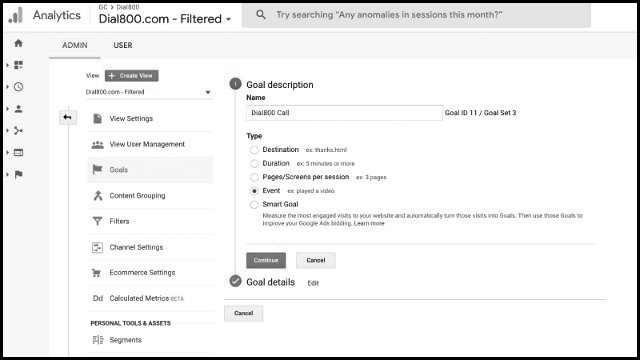
- Click on Goals, and select New Goal
- Name your new conversion goal and select Event as the type, then click Continue
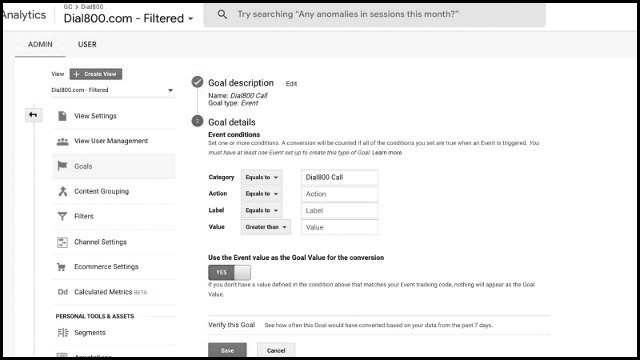
- Enter your Event Category Label that you created in step 13 above in the field next to Category, then select Yes for Use the Event Value as the Goal Value for the Conversion
- Once everything looks correct, click Save
These goals can be viewed by navigating to the left-hand side of the page, under Check Your Goals in Channel Traffic. Navigate to Acquisition, then All Traffic and Channels, and verify that you see your new conversion goal in the conversion dropdown.