This article walks you through the basic steps for building a 1-to-1 call routing profile in AccuRoute®. 1-to-1 call routing sends a call directly to a single number you specify, compared to sending it to a group of numbers.
Why You Should Use 1-to-1 Call Routing Profiles
Within AccuRoute, routing profiles define the flow of logic and prompts that a call will progress through for an inbound number. This ensures your calls automatically get to the right spot.
A routing profile consists of a logical set of actions linked together to define the flow of a phone call. Building a routing profile can be as simple or as complex as needed. This includes a wide range of routing rules from simply ringing a target number to geo-routing, multiple menus, keyed responses, and API calls all while routing differently based on the time of day.
Please note, your targets and groups must be created prior to building your routing profile. Learn how to set up call routing targets here, and how to create groups here.
Creating a 1-to-1 Routing Profile
There are several steps to creating a basic 1-to-1 routing profile, explained below.
- Navigate to AccuRoute
- Select Targets and click Create a New Target (click here to learn how)
- Navigate back to AccuRoute and select Routing
- Click Create a New Routing Profile

- Name the profile and click Save
- You will be rerouted to the Profile Designer Page, select the Home Plate titled Inbound Call
- In the drop-down menu, select Target

- Select the telephone icon titled Target
- In the dropdown menu, select the target you named and created in step 2
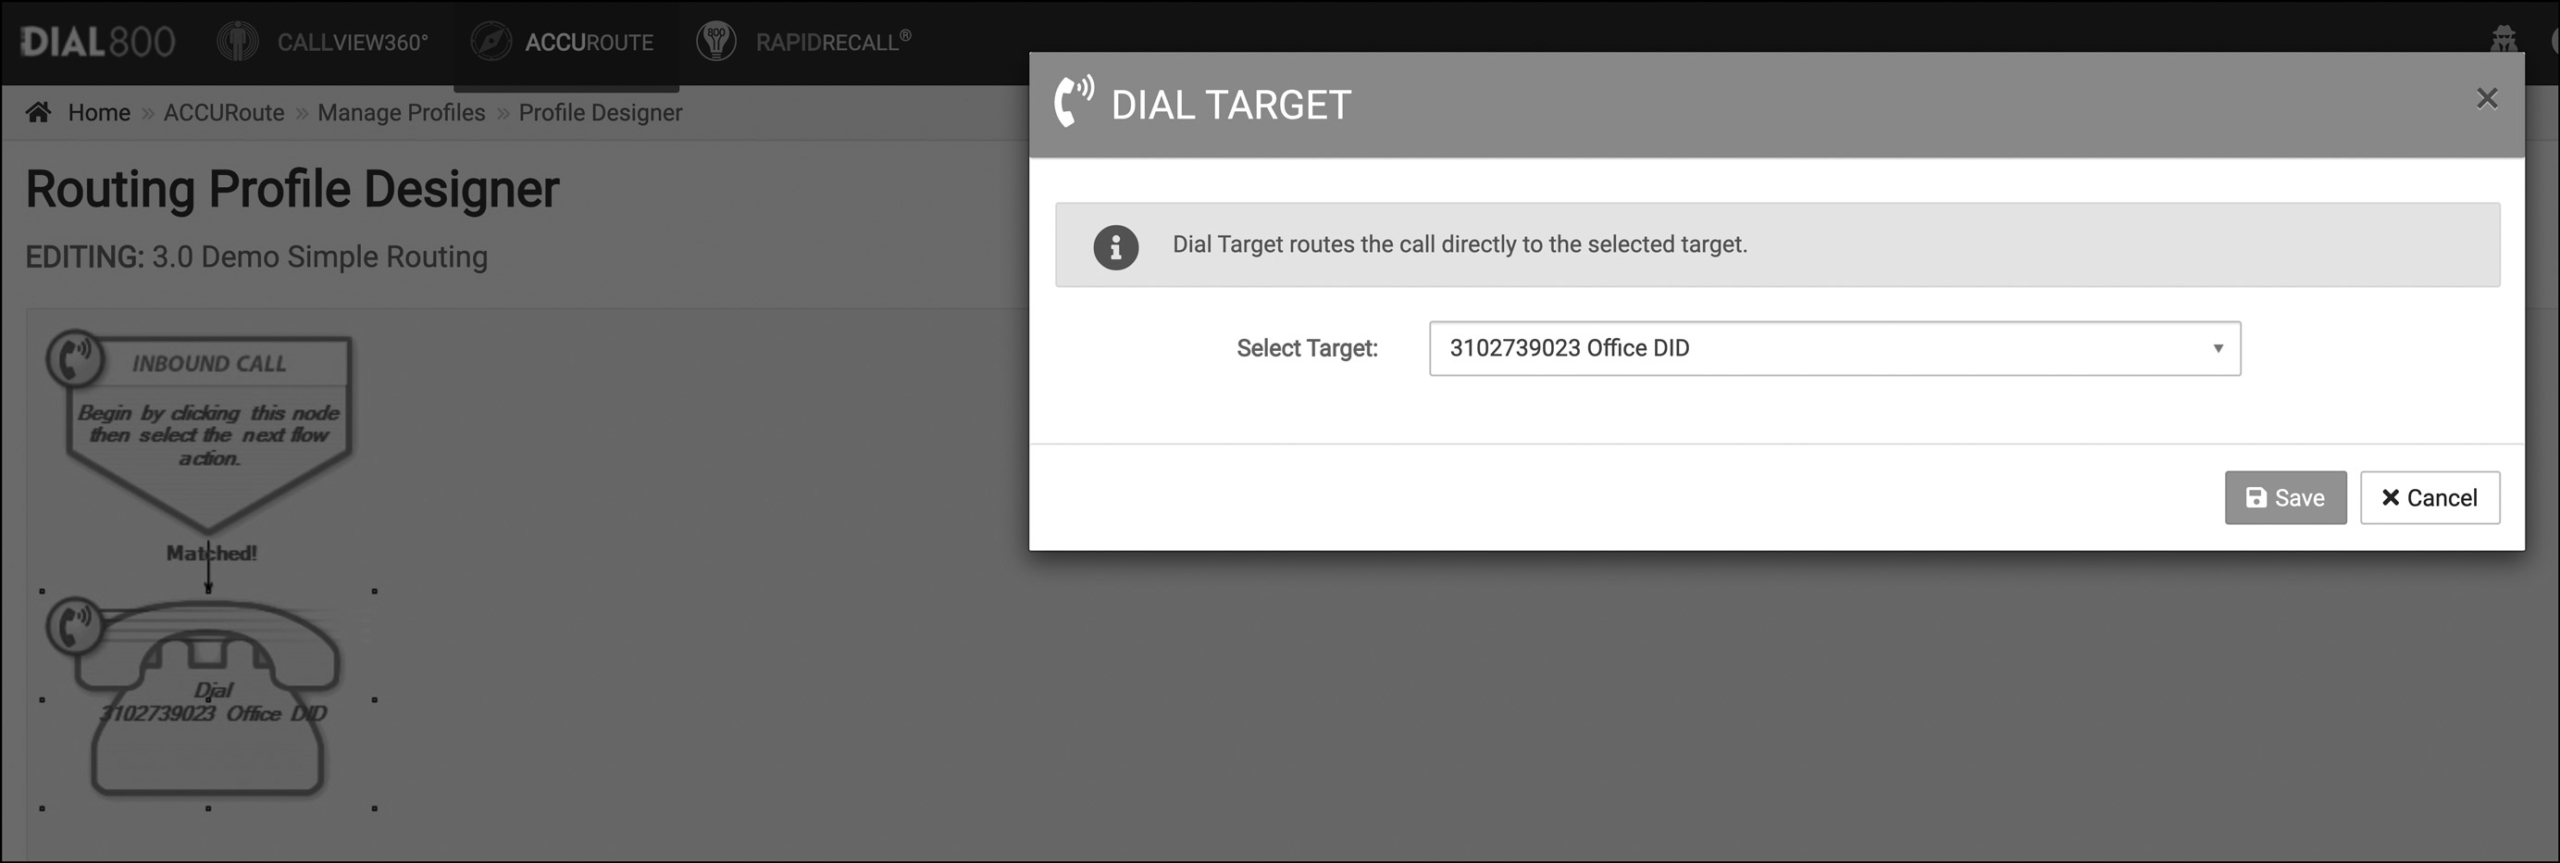
- Click Save
- In the top right corner, click the purple Save Profile and click Save in the pop-up window
- Navigate to the AccuRoute homepage and select Numbers
- Search the DNIS you want to assign to the profile you created and select the Properties of that DNIS on the left-hand side
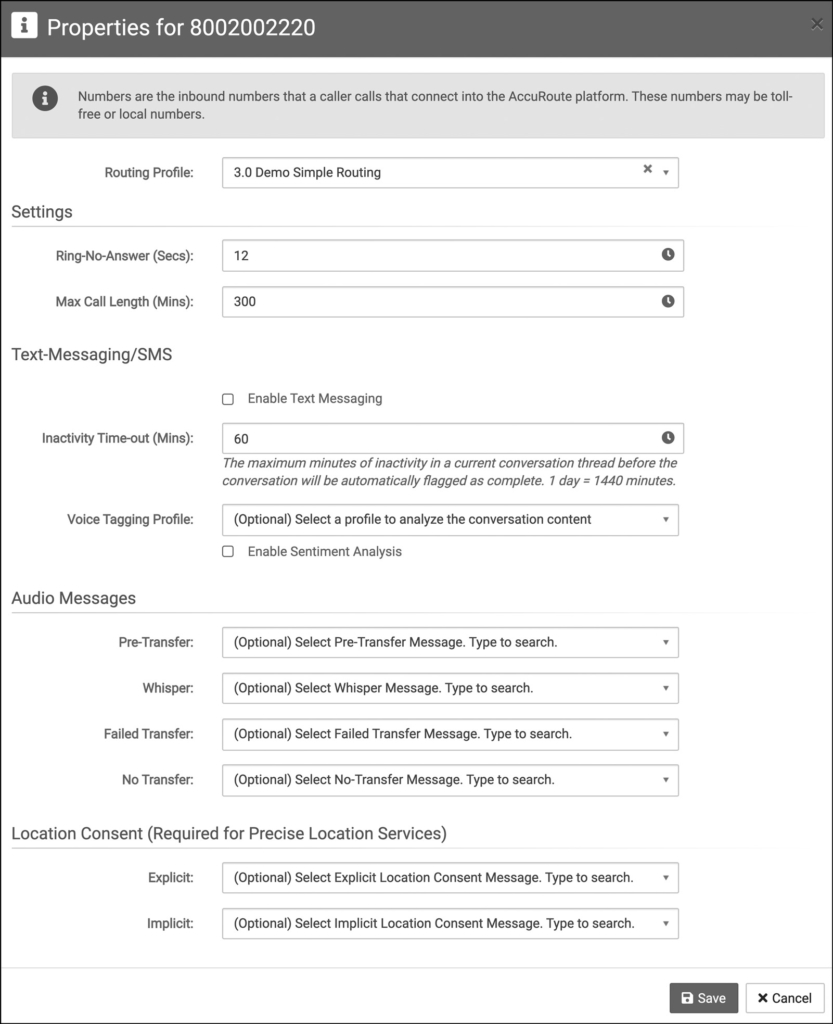
- Find the profile name in the drop down and click Save
Your routing profile is now saved and ready to test by calling your number and seeing if the routing you created works.