This article walks you through the call queue (also called agent queue) properties in AccuRoute® so you can set up a customized queue system for your business.
How Do Call Queues Work?
Within AccuRoute, routing profiles define the flow of logic and prompts that an inbound call will progress through. These routing rules and profiles help your calls get to the correct target.
Your new call queue can be setup with multiple configurations depending on your business needs and call volume. These options includes VoIP Phone System using Hosted PBX technology, SIP Trunking, and routing directly to 10-digit DIDs.
Before creating a queue, you first need to create all your targets. You can set these up as 10-digit phone numbers or configuring hard/softphones for the VoIP phone system. Learn how targets work and how to set them up with this guide.
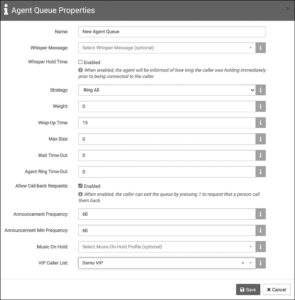
Call Queue Properties
When setting up a call queue, you’ll have several choices to make based on the queue system you want. We’ll explain all the queue properties and your options first, with a step-by-step guide to setting it up below.
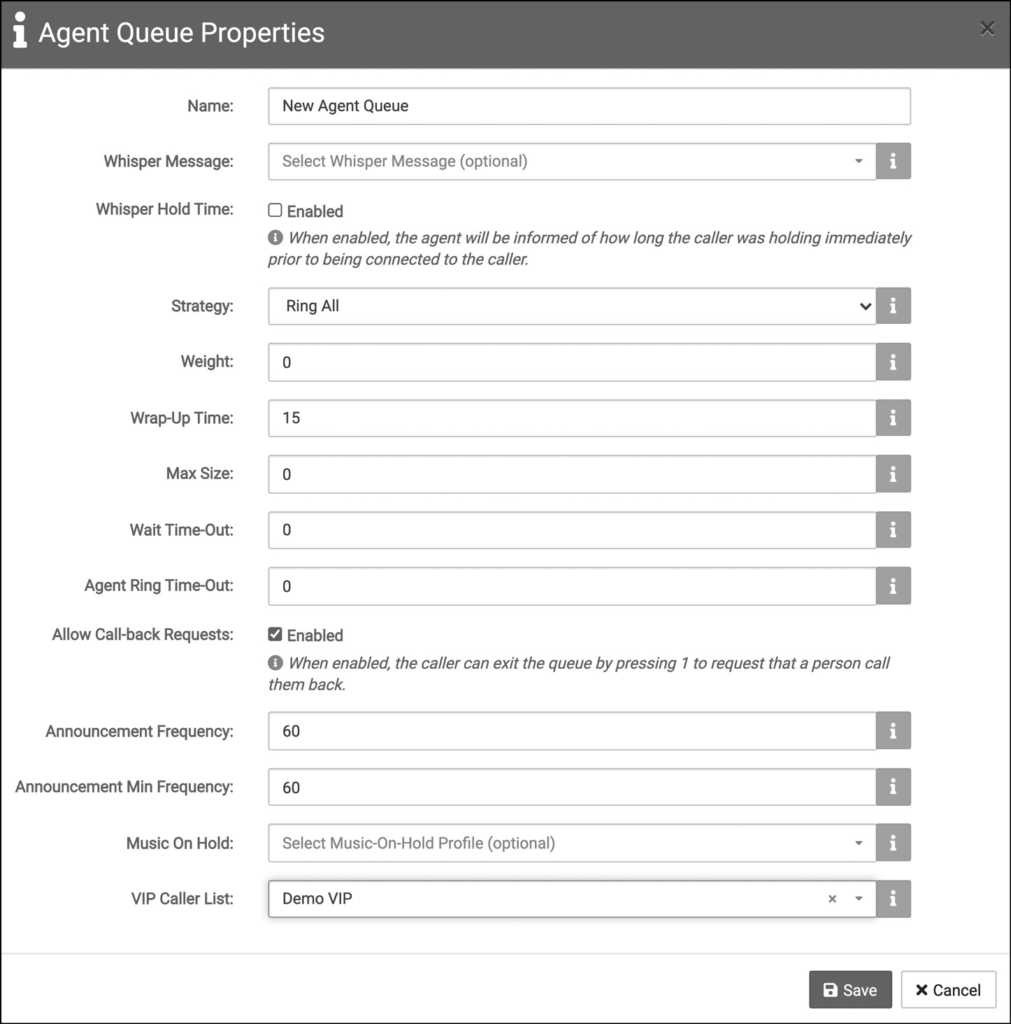
Name
The name you want to give your queue. This can be anything, such as Sales Queue or Support Queue.
Whisper Message
If you enable whisper messages, the target (your agent) who answers the phone will hear a message immediately before they are connected to the caller. This message can include information like the caller’s hold time (a checkbox you can select) and any information they were prompted to enter.
Whisper messages are optional.
Strategy
To manage your call center with AccuRoute agent queues, you’ll need to select one of these queue options from the strategy drop down menu:
- Ring All – rings all available agents
- Least Recent – rings the agent least recently on a call
- Fewest Calls – rings the agent with the fewest calls
- Random – rings a random agent
- Round Robin Memory – rings agents in a round-robin order, picking up where it last left off
- Round Robin Ordered – rings agents in a round-robin order, starting with the first agent in the list each time
- Linear – rings agents in the order they joined the queue
- Random with Weight – rings agents in a random order, prioritizing based on weight
Weight
If you use more than one queue system, you will want to weigh them. This allows the system to determine which call to send through if two calls, from two different queues, attempt to send calls to the same target at the same time. The queue with the higher weight will be sent.
Wrap-Up Time
The time, measured in seconds, that an agent will have to wrap up any tasks after hanging up their last call before they are entered back into the queue to receive another call.
Max Size
The maximum number of callers waiting in your queue. By default this is set to 0, or an unlimited number of calls in queue.
If you want to limit this, enter in the maximum number of people you want waiting in queue. If someone tries to call when that queue is full, the caller will not be placed in queue.
Wait Time-Out
The maximum amount of time, measured in minutes, that a caller can wait in queue. If their wait exceeds that time, they are removed from the queue.
Agent Ring Time-Out
The amount of time, measured in seconds, that an agent can attempt to call a number before it is recorded as a No-Answer.
Allow Call-back Requests
An increasingly popular option with customers, this allows them the option to press 1 to select a call-back instead of waiting on the phone. If they select this option, the caller is rejected from the queue and the call back routing process is triggered.
Announcement Frequency & Minimum Frequency
The default time, measured in seconds, between announcements to callers on their current position in the queue.
The default value is set to 0, which disables these announcements.
If you use queue placement announcements, you may also want to set the minimum frequency. This is the minimum time, measured in seconds, that must pass before a caller can hear the next announcement. If a caller’s place in queue is constantly changing, this stops the announcements from frequently interrupting hold music.
Music on Hold
Music on hold is an optional field. If you do not create your own on-hold music profiles the system will use AccuRoute’s default music.
VIP Caller List
This allows you to create a VIP caller list. When a caller on that list calls, they will automatically be placed in the front of the queue.
VIP caller lists are optional.
Creating a Caller Queue in AccuRoute
Once you’re familiar with the queue properties and know how you want set yours up, follow these steps:
- Start by creating targets for each agent (go here to learn how to create a target)
- Navigate to AccuRoute and select Agent Queue
- Click + New Agent Queue at the top of the page
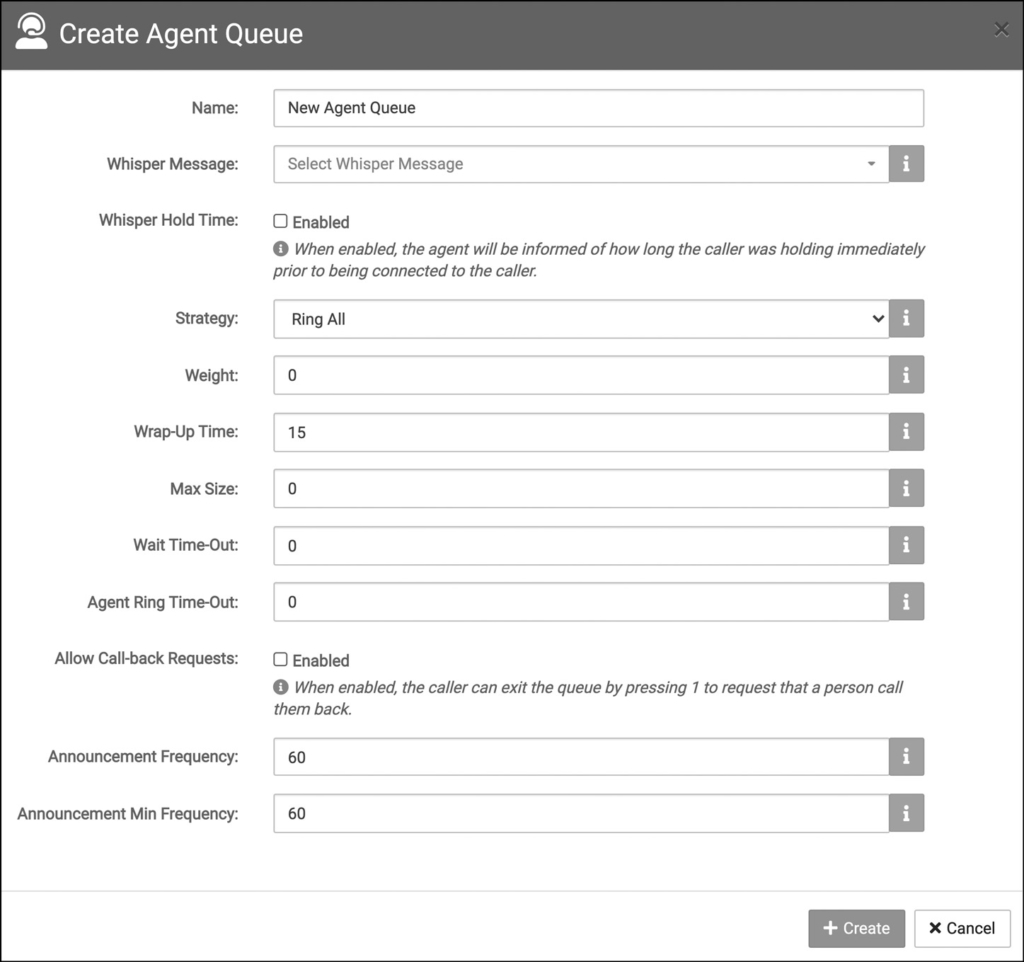
- Fill out the agent queue properties to your desired queue management settings
- Click Create
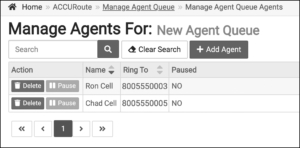
- Once your New Agent Queue is created, add agents by clicking Agents and then clicking + Add Agent to add targets

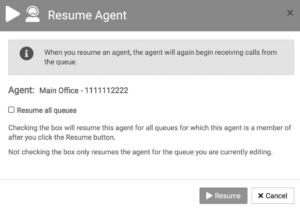
- Click the green Resume button to add/remove agent from multiple queues, or remain in only the queue you’re currently creating
- Once your agent queue is created and your target agents are added, click Save
Optional Queue Settings
Some of the agent queue settings require you to upload a file or create a list before using them in your queue profile. Follow these steps for adding hold music or VIP lists.
Creating Music on Hold for an Agent Queue
Follow these steps to add hold music to your agent queue. Please note that AccuRoute can accept mp4 and wav audio files.
- Navigate to AccuRoute® and select Music on Hold
- Click + New Music Profile at the top of the screen

- Give your music profile a name and click +Create

- Click Edit, then + New Music File to add audio file

- Your File will turn green indicating the doc can be uploaded (if it is not the correct file format, it will turn red)
- Click Save
- Navigate back to AccuRoute and select Agent Queue
- Click the Properties button on the queue you want to update with hold music
- Select the music profile you created from the Music On Hold drop down
- Click Save
Creating a VIP Caller List for an Agent Queue
- Navigate to AccuRoute and select VIP Callers
- Click + New VIP List at the top of the screen

- Give your list a name and click +Create

- Click Edit to add DIDs (caller IDs) for each VIP caller (DIDs can be added individually or in bulk)
- Click Save
- Navigate back to AccuRoute and select Agent Queue
- Click the Properties button on the queue you want to update with a VIP list
- Select the VIP caller list you created from the VIP Caller List drop down
- Click Save
Your call queue is now saved and ready to use with a routing profile.


